We all scream for ice cream! – Multi-layered Ice Cream Cake

IMG_2672

This weekend is my good friend’s birthday!  Since I’ve been so inclined to bake lately I asked him, “If you could have any kind of cake in the entire world for your birthday what would it be?”  Much to my surprise, without a thought, he responded, “ICE CREAM CAKE!”  This man is turning 34.  Regardless, I was excited by the unexpected challenge so I began doing some research on ice cream cakes.

It seemed relatively simple, just layers of ice cream and cake!  Pretty much exactly what I expected.  I, however, was having a particularly busy week and the amount of work seemed like it would very time consuming.  A project for the weekend perhaps.  Unfortunately, I didn’t have a weekend since the party was planned with only a few days notice.  Instead, a neighbor of mine told me about a really simple way to assemble a delicious ice cream cake in no time at all and thus, this method was conceived!

10518707_10152552727384754_1090337394043754965_n

IMG_2669

Making this ice cream cake for him and enjoying it with the company of my friends reminded me that there is no age limit on the pure, unadulterated enjoyment that ice cream cake can give.  Who says adults can’t act like kids from time to time?  I’m certainly not mature and responsible most of the time anyways!  The night was a blast, we all dressed up and went out to a local Nepalese restaurant for dinner.  Then we drove to my house for cake, a bonfire, and swimming!  I love happy summer nights like that – what a treat.

IMG_5084

IMG_2673

SUPER SIMPLE AND QUICK ICE CREAM CAKE

The Ingredients:
18 generic grocery store ice cream sandwiches
cool whip
food coloring (optional)
sprinkles (NOT optional)

The Method:
1. If desired, dye the cool whip the color you want the outside of your cake.  The cool whip is the “frosting”
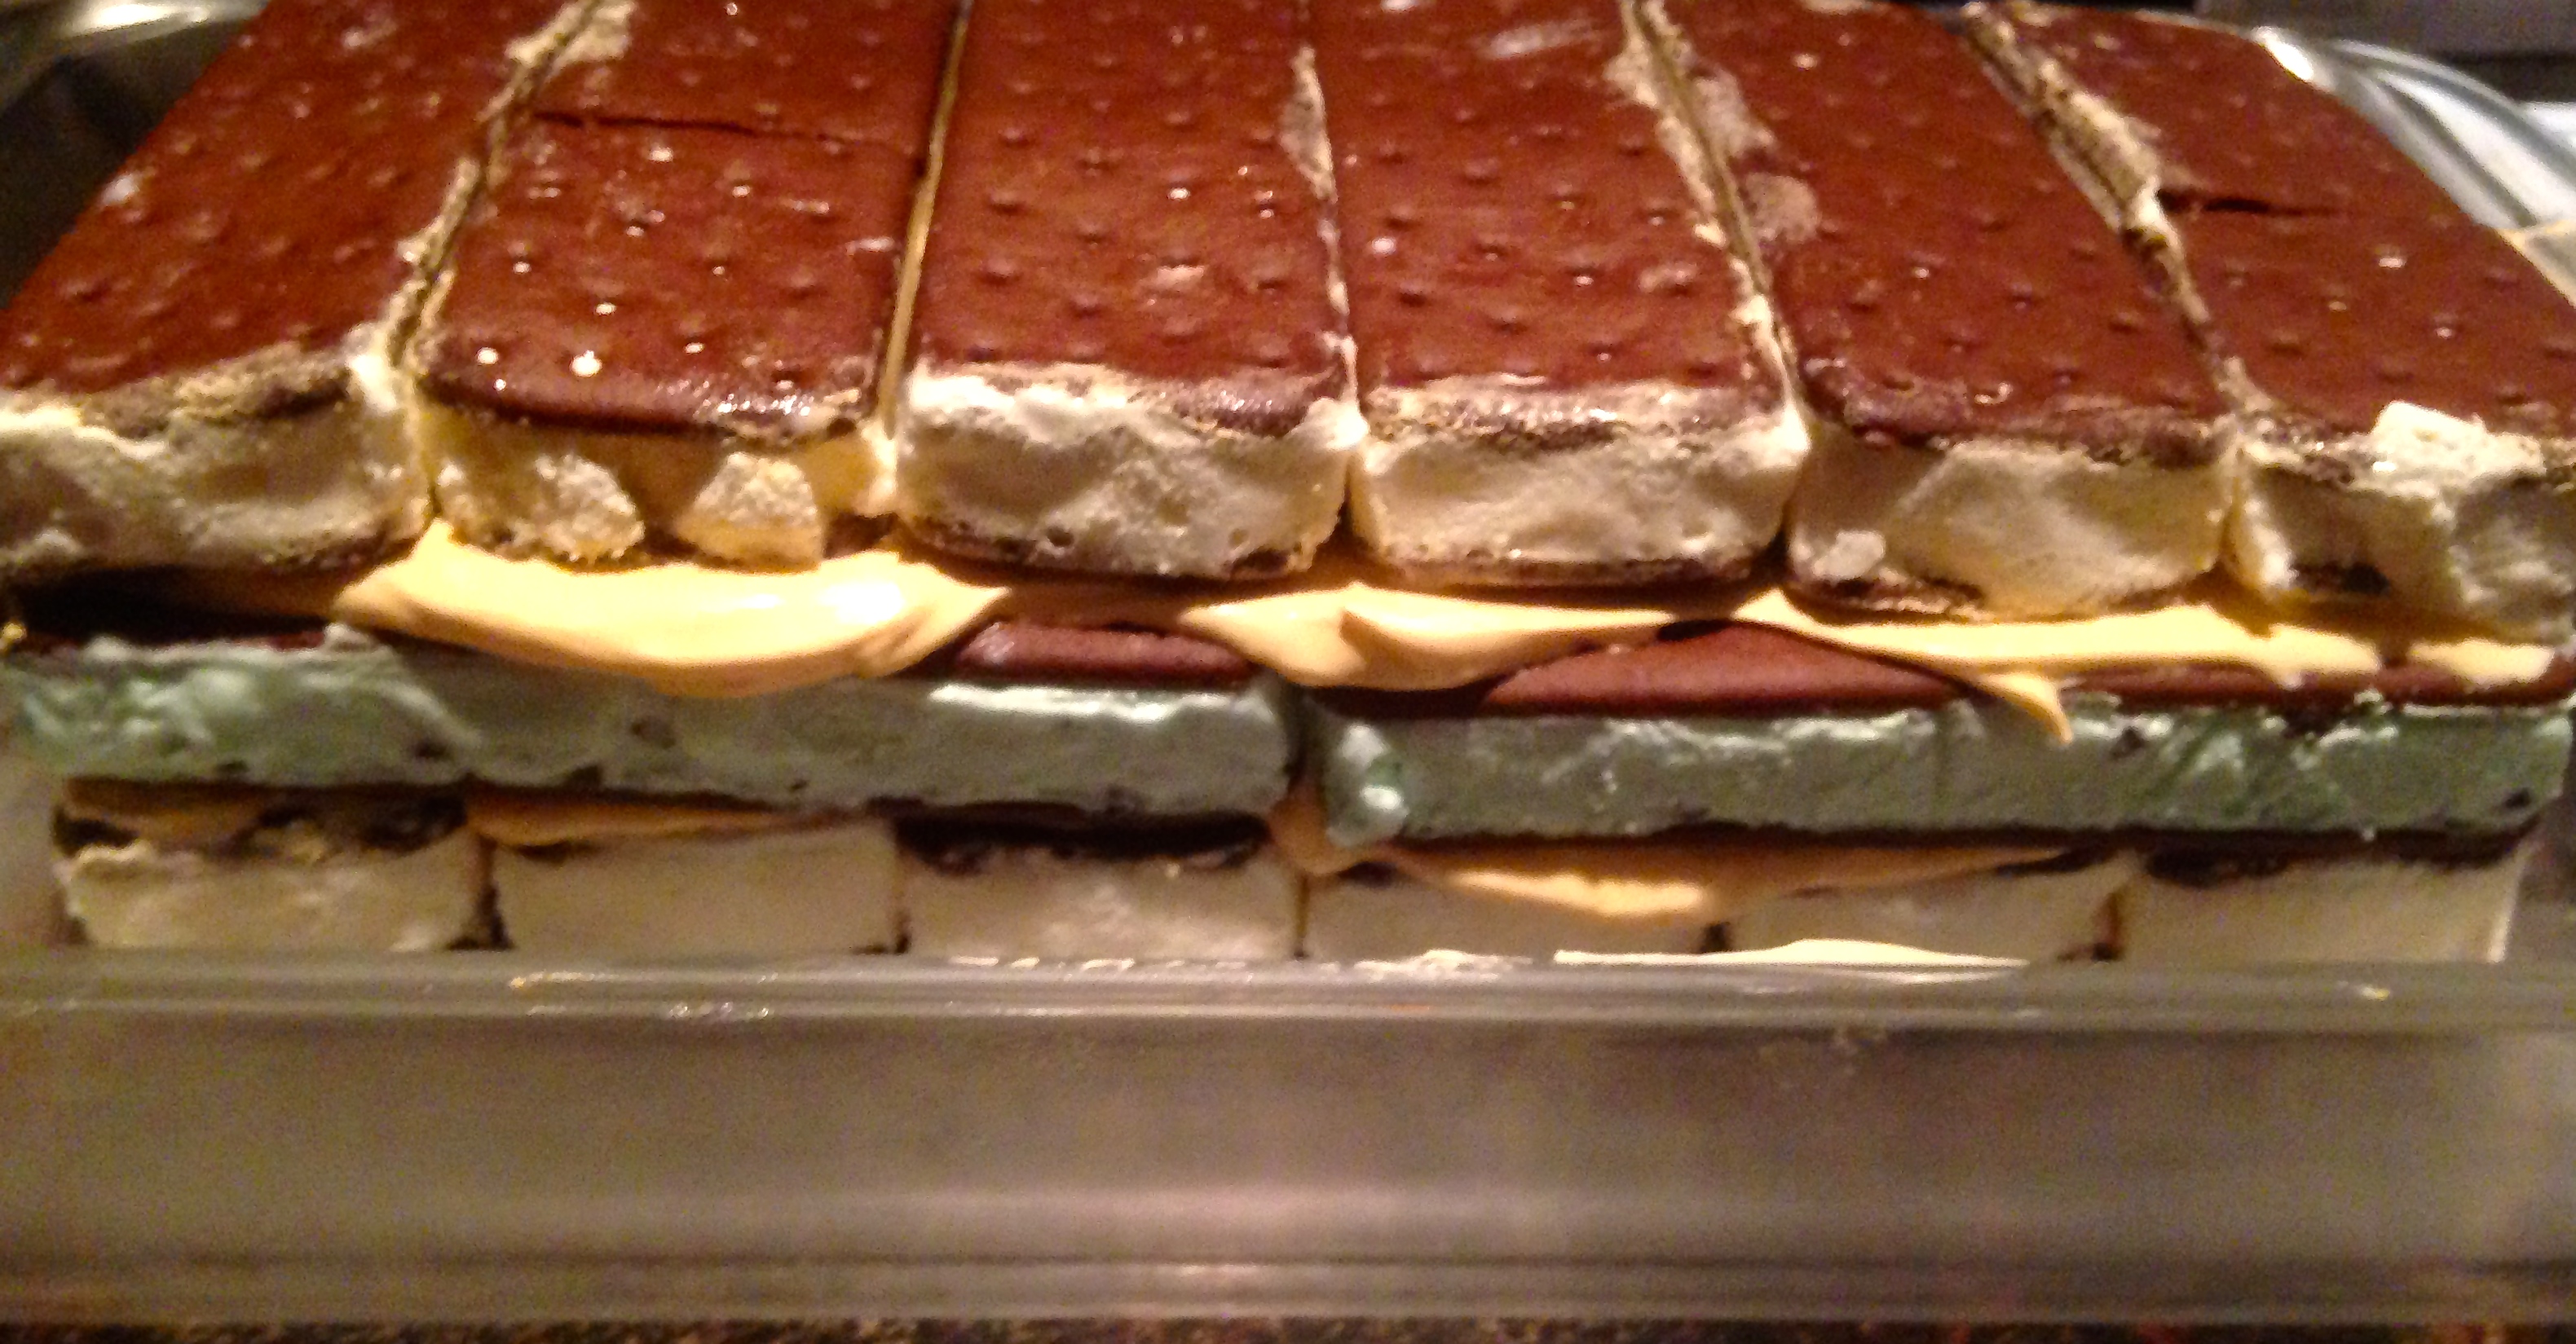
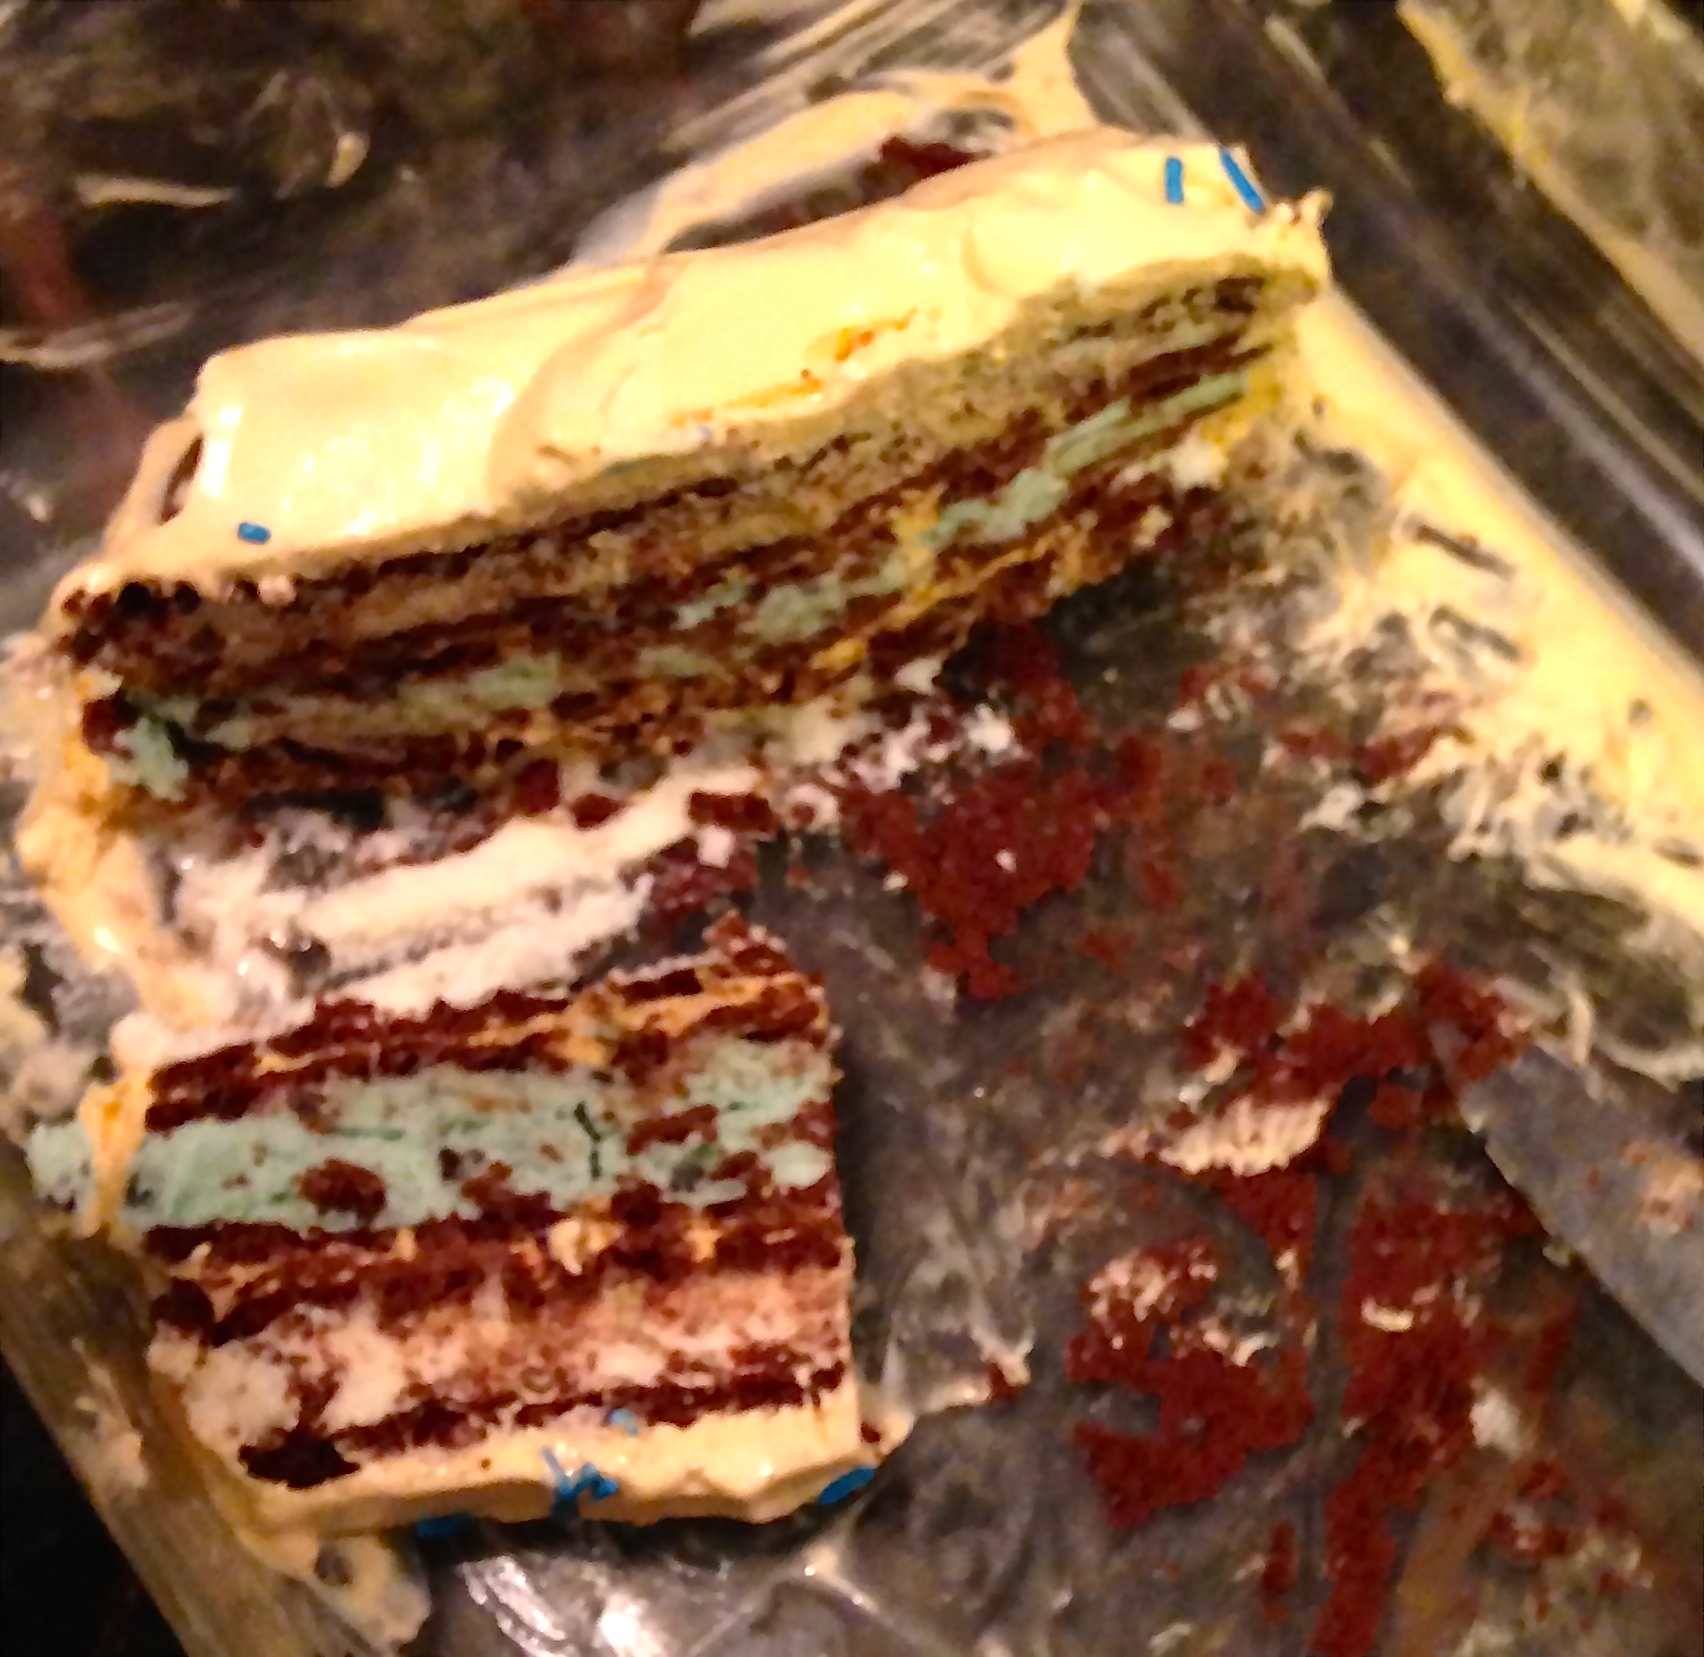
2. Begin by laying down six of the ice cream sandwiches side by side in a large baking dish
3. Cover the 6 sandwiches in a layer of cool whip
4. Lay down six more sandwiches on top of the cool whip layer in the opposite direction (see pictures)
5. Cover those sandwiches with another layer of cool whip
6. Continue this process with one more layer of sandwiches
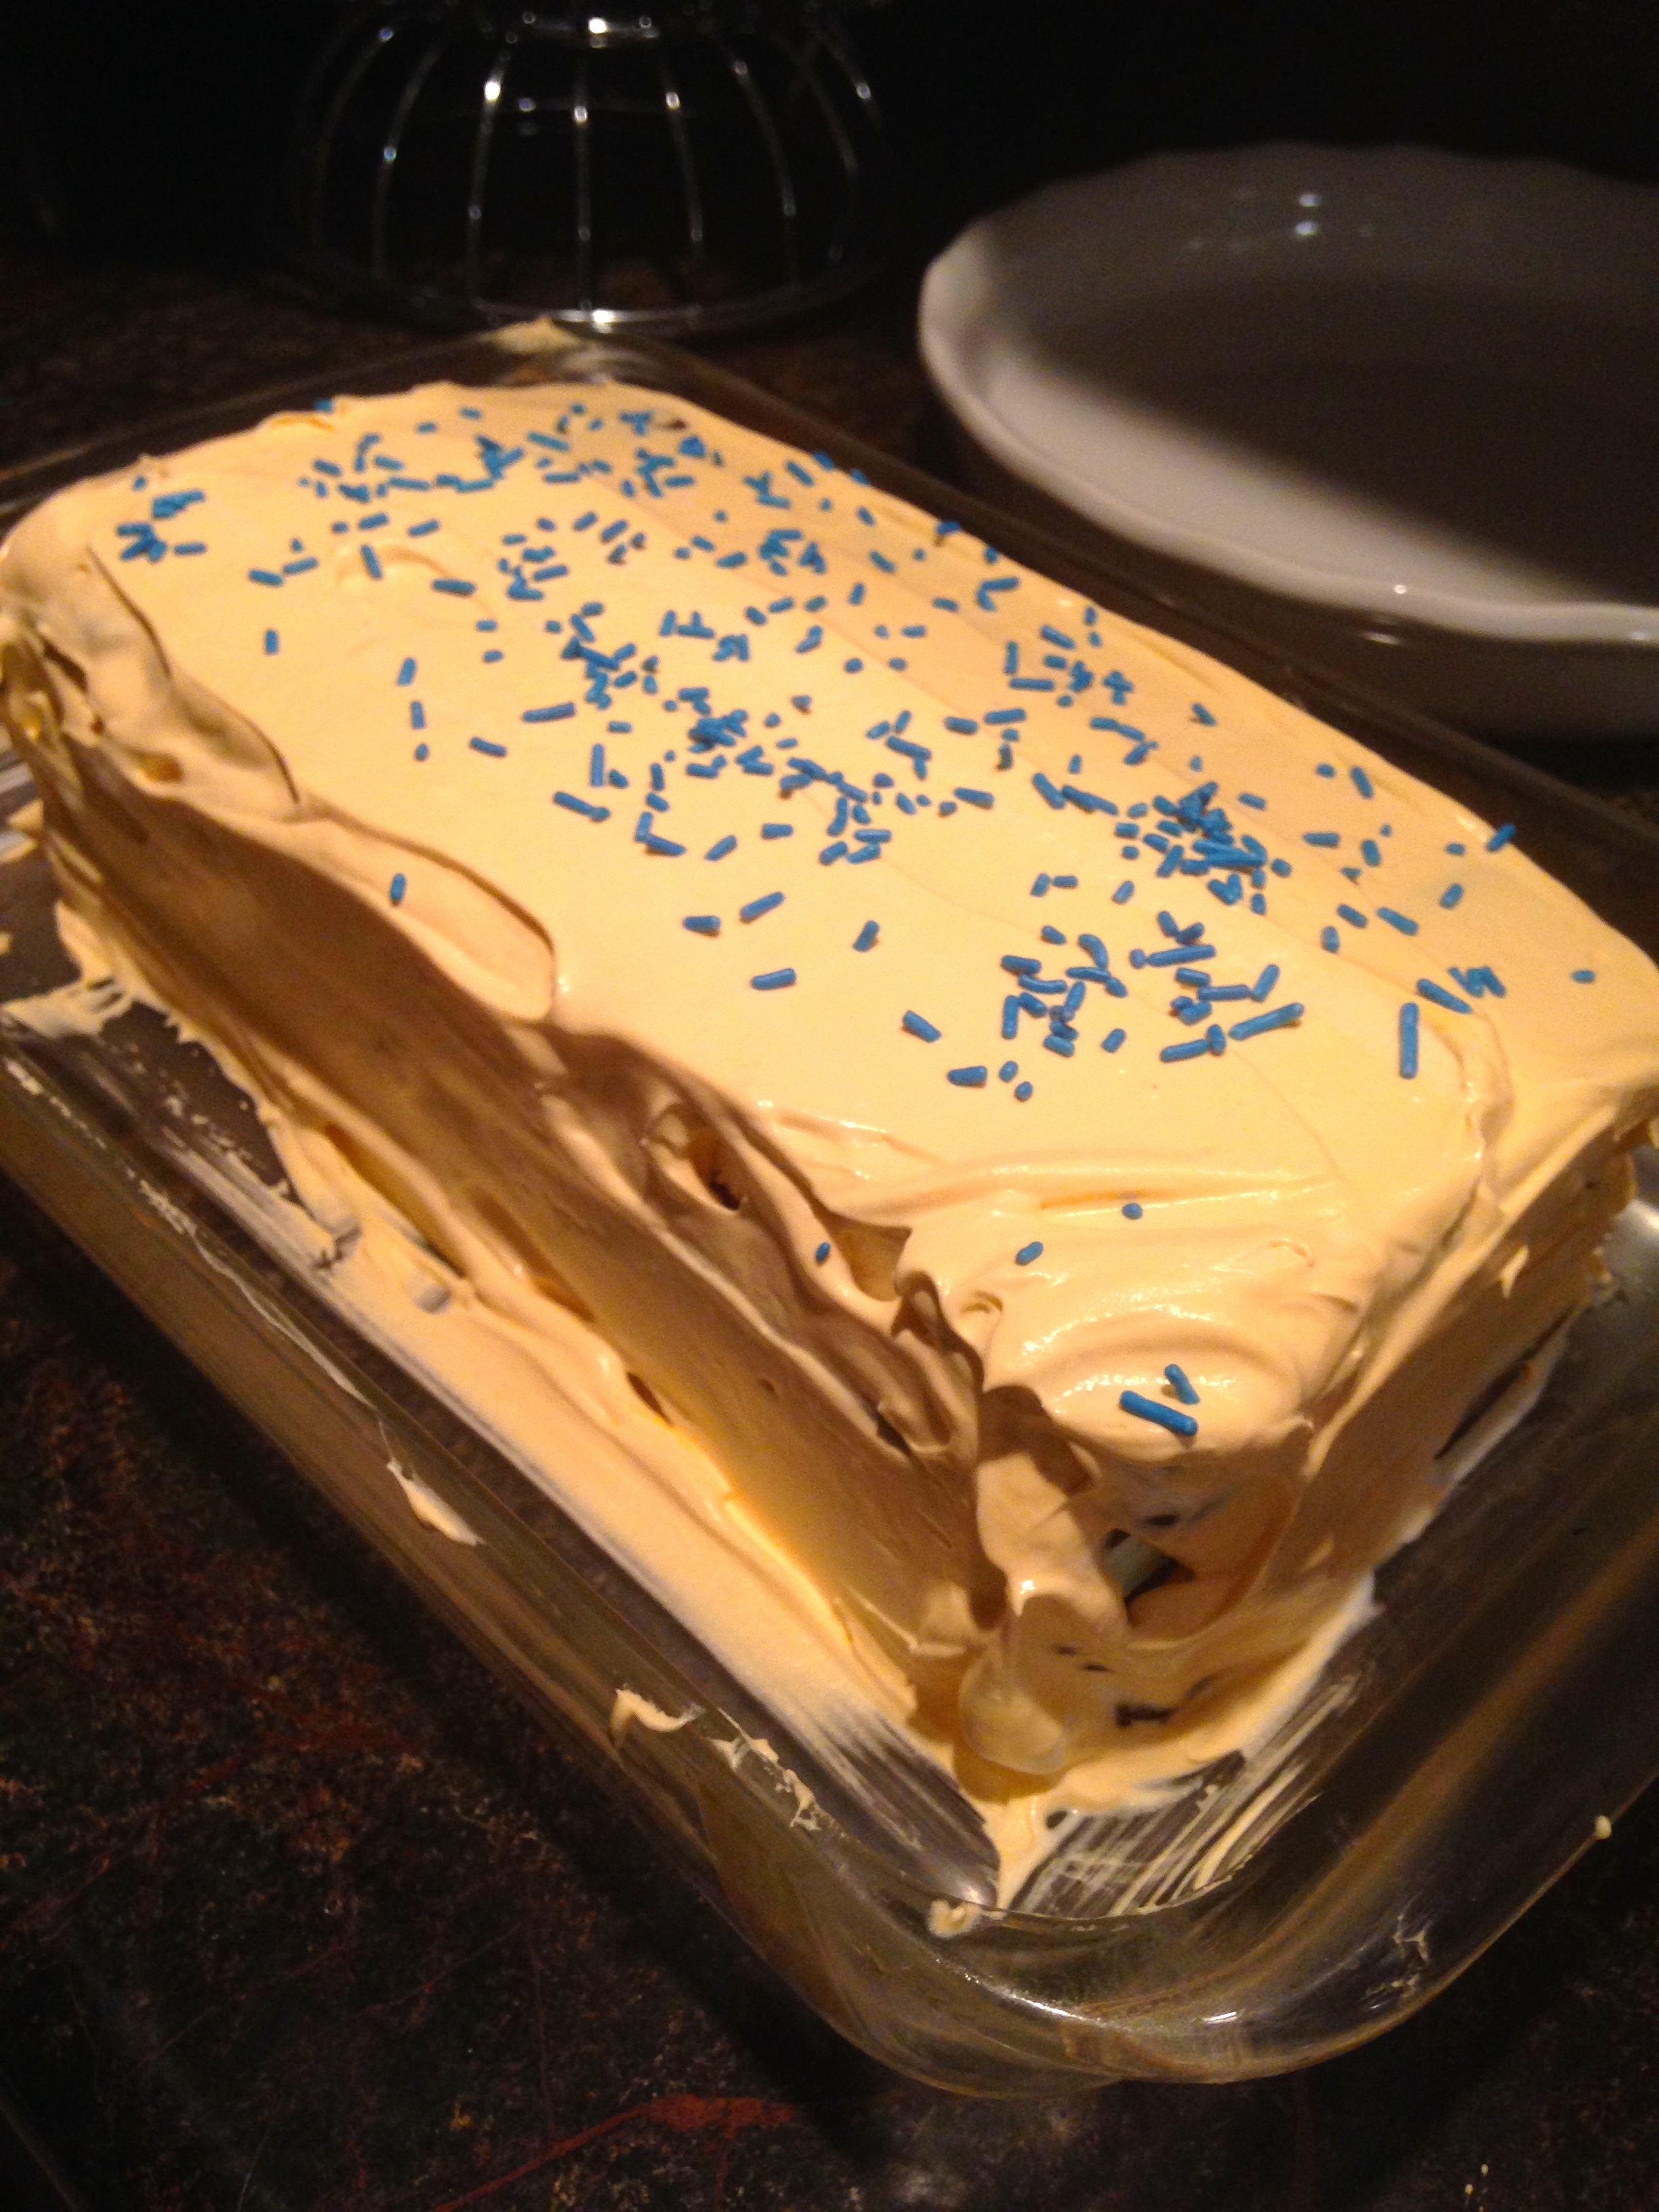
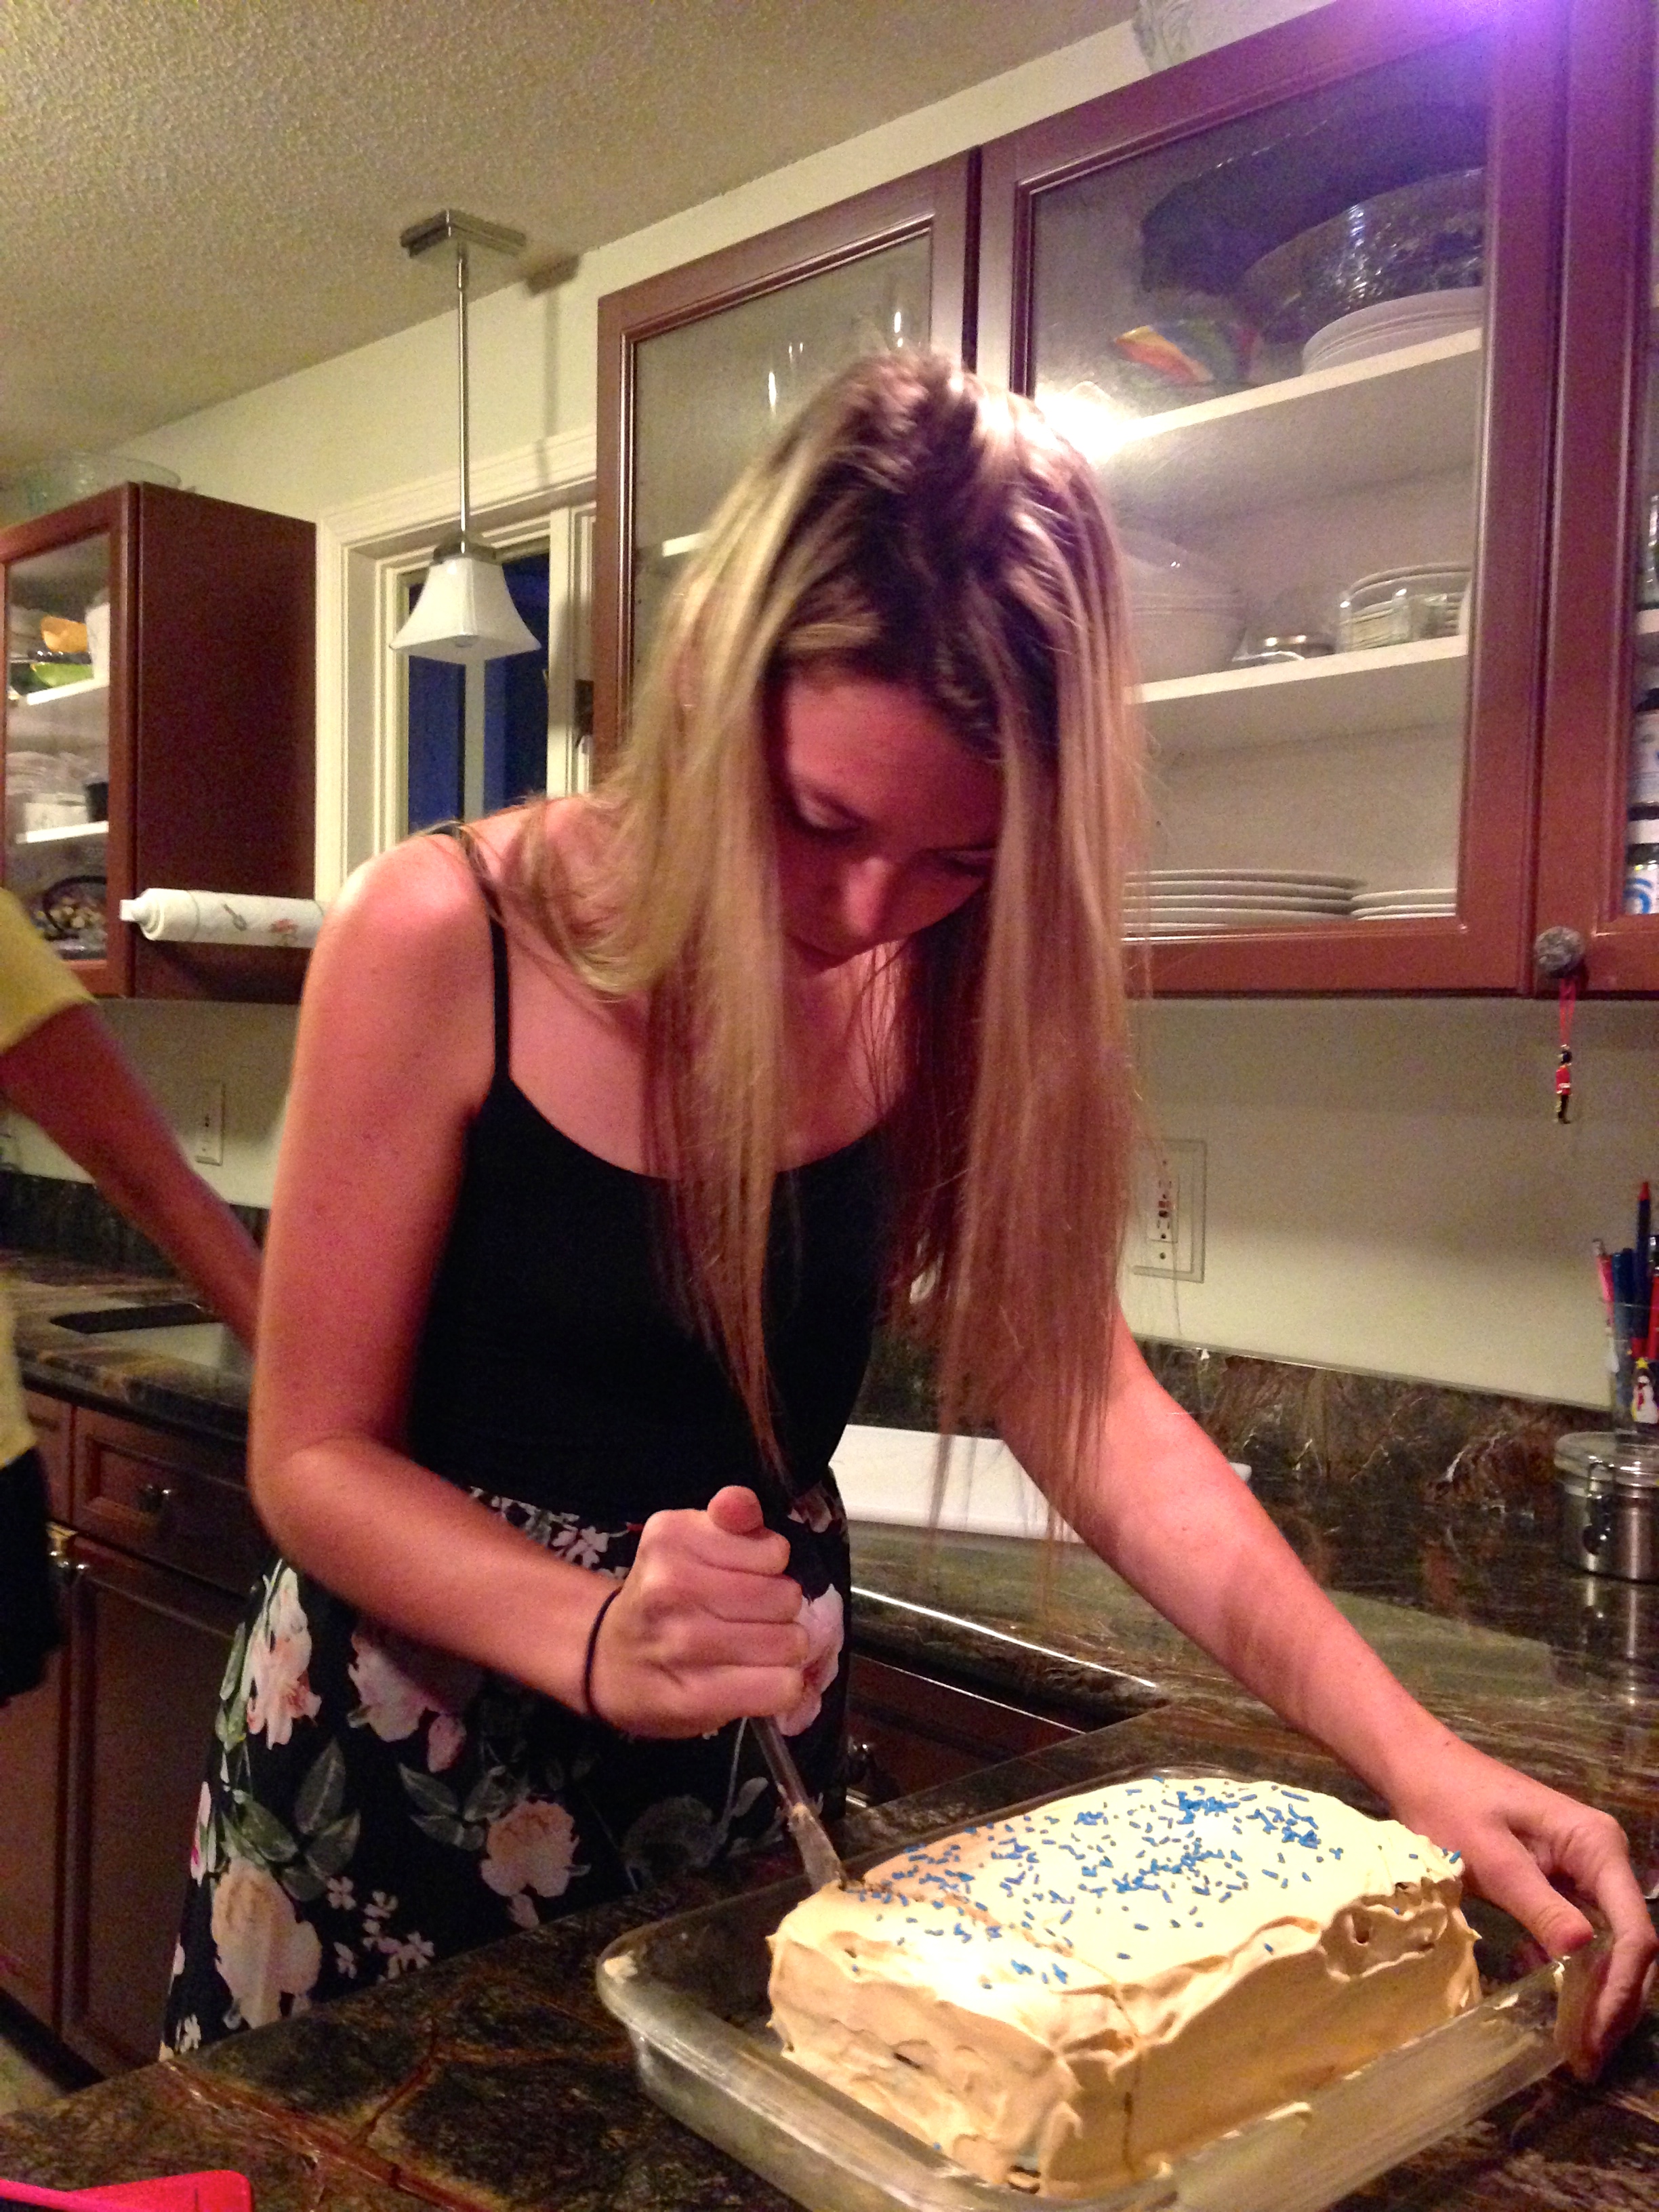
7. Frost the entire outside of the cake with cool whip
8. Top with sprinkles
9. Freeze for at least a few hours, overnight if possible
10. Allow the cake to thaw for 15 minutes before serving
11. Enjoy!

A daybreak tradition – Oatmeal

IMG_5333

Did I mention that I have an oatmeal obsession?  Because if I haven’t then I’d like to make that abundantly clear right now: I LOVE OATMEAL!  Every morning I make myself a big bowl of it to start my day off right.  It took me a few months of trial and error to finally figure out exactly how I like my oatmeal.  Now that I have a great recipe that works, it’s difficult to stop myself from making it for EVERY meal!

My morning oatmeals all share the same base, though what I mix into it changes based on what I have available in my house at the time.

IMG_5327

I start with 1/2 cup of quick oats, 1/2 cup of vanilla almond milk, and 1/2 cup of water.  I throw those three things in a bowl, mix it up, and put it in the microwave for two minutes.  (Actually, I really put it in for exactly 2 minutes and 15 seconds.  I’m not sure why but at this point I’m obsessive about this timing)

While it’s cooking in the microwave I start preparing my mix-ins.  I cut any fruit that needs it and get together the right portion of anything else I might add in.

Once the oatmeal is done I let it sit for a minute to thicken up.  Then I mix in a packet of truvia and a bit of cinnamon.  You can substitute real sugar for the truvia, or any other sweetener you like.  Sometimes I sub in a tablespoon of vanilla protein powder.  As for the cinnamon, I rarely substitute anything in for it a;though occasionally I use a teaspoon of cocoa powder instead for a chocolatey flavor!

IMG_5331

Next come the mix-ins!  My favorite combination is a banana, raspberries, and almonds but some other options that I use from time to time are:
-coconut
-nectarines
-strawberries
-blueberries
-raisins
-pecans
-apples
-peanut/almond butter

You can mix and match anything that sounds good to you.  As long as you have the base of the oatmeal right it will be super delicious!

IMG_5332

The Holy Grail of my kitchen cabinets – No Bake Cookie Butter Cookies

IMG_5343

Living in New Hampshire there are a few main stream chains that just haven’t expanded into my tiny little state.  Although we are slowly seeing places such as Whole Foods and Chipotle pop up, they are still few and far between…  One such example of this unfortunate phenomenon is our lack of Trader Joe’s.  My entire extended family is from California so I’ve experienced my fair share of this wonderful food paradise.  However, the closest one to my home is roughly forty minutes away!  That doesn’t mean that I don’t venture out there from time to time, but it’s rare.  Therefore, when I do make the journey to Mecca (sorry, I mean Trader Joe’s) I make sure to stock up on my favorite items. One of which is predictably… cookie butter!

example A: my empty and therefore sad jar

This decadent and addictive cream of joy always seems to be singing at me from the shelf, “RACHEL! I AM RIGHT HERE, STOP PRETENDING YOU’RE NOT GOING TO BUY SEVERAL JARS OF ME!!”  From the aisle I feel compelled to reach forward and take this holy grail of butters.  It’s a very persuasive food product.

So it only seemed right that I incorporate my favorite treat into some baked goods!  I found this recipe on Pinterest and had to halve it because (surprise, surprise) I didn’t have enough cookie butter left in my jar!  This resulted in only ten cookies, though they were ten VERY delicious cookies!  I recommend doubling (or even tripling) what I did, you will not regret it!

NO BAKE COOKIE BUTTER COOKIES

IMG_5346

The Ingredients:

1/4 cup butter
1/4 cup milk
1 cup sugar
1/4 cup cookie butter
1 1/4 cup oatmeal
1 tsp vanilla

The Method:

1. In a sauce pan, bring butter, milk, and sugar to a boil
2.  Once boiling, remove from heat and mix in cookie butter, oatmeal, and vanilla
3.  Stir to thicken
4.  Drop large spoonfuls on to parchment paper and wait at least 30 minutes for cookies to firm up

The ultimate cookie – Mint Chocolate Chip Cookies

IMG_5334.jpg

All throughout my childhood I HATED mint chocolate chip ice cream.  I’m not sure why, perhaps it was the sickening green color or the bite of the mint flavoring – but I was simply not a fan.  I always preferred the big chunks of chocolate chip cookie dough or the sweetness of strawberry cheesecake.  However, as I grew up my tastes shifted and in my late teens I discovered a new found love for all things mint chocolate! 

the face of pure love

That’s why, when I stumbled upon this recipe idea I knew I simply had to try it!  Mint chocolate chip cookies!  What a treat!  And I must say in all honesty that out of everything I have made so far, these cookies are one hundred percent my favorite.  The recipe called for a lot of butter and less sugar than I was expecting.  The result was an extremely creamy texture that makes you want to go back for seconds, thirds, and maybe even sevenths or eighths!

I won't tell ;)
I won’t tell 😉

I probably accidentally used too much green food coloring and so my cookies came out EXTREMELY green – but that in no way effected the delicious sweet mint flavor (and it gave me a good idea for a St. Patricks day treat!)

I made 33 cookies with the recipe (probably would have made 36 if I could have stopped myself from eating the dough!)  Less than 5 hours later there are only 10 left!  My dad literally licked the bowl of dough clean. 

I would say this was another enormous success.

MINT CHOCOLATE CHIP COOKIES

IMG_5337.jpg

The ingredients:

2 1/2 cups flour
1 teaspoon baking soda
1/2 teaspoon salt
2 sticks butter, softened
1 1/4 cups sugar
2 eggs
1 teaspoon peppermint extract
1 1/2 cups chocolate chips
green food coloring

The method:

1. Preheat oven to 375°F.
2. Mix flour, baking soda and salt in medium bowl. Set aside.
3. Beat butter and sugar in large bowl with electric mixer on medium speed until light and fluffy.
4. Add eggs, food color and peppermint extract; mix well.
5. Gradually beat in flour mixture on low speed until well mixed.
6. Stir in chocolate chips.
7. Drop by heaping tablespoons about 1 inch apart onto ungreased baking sheets.
8. Bake 10 minutes

A scrumptious union – Red Velvet Shortbread Cookies

IMG_5324.jpg

Do you love shortbread cookies?  Do you love red velvet?  If the answer to both of those questions is yes, then you are probably my soulmate.  Shortbread cookies are always my favorite Christmastime treat and so I knew sooner or later I would need to bake my own version!  When I was looking for baking inspiration online I found a Buzzfeed post about red velvet and finally educated myself as to what a red velvet baked good actually entails. (Basically it’s just vague chocolatey flavoring and some red food dye).  That’s when the idea for these cookies was born: Red velvet shortbread cookies!  Doesn’t that combination just sound like a match made in heaven?

 rvsblove

Making these cookies was a little more complicated than I anticipated.  I used the electric mixer (which is a life saving tool) but the dough took a long time to form and I ended up having to knead it with my hands a lot.  This led to my hands looking bloody and scary for the next day because of all the food coloring that was in the dough!

nobody died in the making of these cookies… I promise.
nobody died in the making of these cookies… I promise!

Regardless, the cookies did eventually come out!  I had mixed reviews of this recipe, some people LOVED it and chowed down a few in a row (myself included) while some people let me know that they were, “good… but not your best ever”.  I think it all comes down to a personal preference for cookie types so I wasn’t too offended by the objectors.  Personally, I think they were delicious!

The real fun part of this recipe came when I decided to “drizzle” white chocolate on top of the cookies once they cooled.  This is where my inexperience in the kitchen definitely revealed itself.  I melted white chocolate in the microwave and made several valiant efforts to “drizzle” it on the cookies, but the chocolate just would not cooperate!  No matter how much I willed it to be melty and yummy looking with gentle coaxing, the chocolate did not want to come off the spoon and instead stayed solid like a stubborn child.  In the end I decided to just put a little button of white chocolate in the center of each cookie, it kind of looked artsy so I pretended that it was my plan all along… (shhhh don’t tell!)

RED VELVET SHORTBREAD COOKIES

PicMonkey Collage.jpg

The Ingredients:

1 1/4 cups all purpose flour
1/3 cup granulated sugar
2 Tbsp cocoa powder
1/4 tsp salt
1/2 cup butter
Red liquid food coloring
1/4 cup white chocolate

The Method:

1. Preheat oven to 325 degrees
2. In an electric mixer combine flour, sugar, cocoa powder and salt
3. Cut in butter and add in food coloring (until desired redness is reached), it will start to have a crumb-like texture
4. Knead with hands until the dough forms into a round ball
5. Roll out the dough to a 1/4 inch thickness and cut out cookies with a cookie cutter (or the top of a glass if you lack supplies like me)
6. With the scraps continue to roll out the dough until you have used all of it
7. Bake cookies for 18-20 minutes
8. Once cooled, melt your white chocolate and attempt a pretty “drizzle” (good luck!)